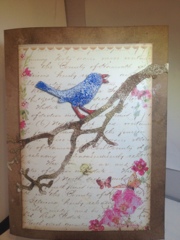
Free background from VintageMadeForYou

23 June 2013

Homemade modeling paste

One of my favorite YouTube channels is Luvlee scrappin.  She has all kinds of homemade tricks and many tutorials on art items.  I like so many of her tutorials I can't even pick my favorite.

I did stumble across this one some time ago.  This one teaches you how to make your own modeling paste.  I put it in my favorites on YouTube because at the time I had modeling paste.  Yesterday I ran out and decided it was time to try Leeanne's recipes and make up a couple of batches.

You really should watch Luvleescrappin's tutorial.  It is detailed and she is entertaining.  Here is the link.......here.


Now that you have watched Leeanne do her magic, I will tell you that I followed her small batch recipes.  I made one with baby powder and one with baking soda.


I encourage you to make some and see which you like better.  So far I like the baking soda one the best, but I am going to keep trying them both until I am out of what I made up.  From there I intend to only make the favorite one.

Thanks Luvleescrappin! 


16 June 2013

Cards made this week

I have depleted my stash of cards, so this weekend was devoted to replenishing my stockpile.  I started with some photos of movie stars.  I called the first set "The Old Hollywood Collection".  They will be used to send to my movie buff friends.


I then made many generic type cards that could be sympathy, birthday, thank you or just because cards.


You can make cards without making a birthday card...


Last were a set of coffee cards for fun.


15 June 2013

Distressed Abbey Road

I wanted to make my dad Abbey Road for Father's day, but I wanted to make it in my way.  Very distress, altered type of Abbey Road.

I started by painting the background in blocks of color to match the album cover.  In the center, I mixed some shades of blue.  On each side, I painted a patch of green to background the trees.  And under the horizon line, there is a grey/silver mix to simulate the pavement.

Once all the paint was dry I added some blue paper to the blue and a few stamps.  To the green, I added bunched up tissue paper. I adhered the tissue at the same time I was bunching it up and I used mod podge.

After that dried, I painted the tissue in many different shades of green and sprayed some Caribbean Sea Blue misting spray onto the blue sky.

To the pavement I dabbed on some browns, black, red and yellow.  Once it was dry I added some red crosswalk strips.  I missed this with many misting sprays.

The Beatles are hand cut from grungepaper, stamped with Close to My Hearts music note stamp.  Distressed with Black Soot ink by Tim Holtz and sprayed with Golden Slumbers misting spray by Michelle's Musings.

I adhered The Beatles with dimensional foam and hot glue.  Everything got a bit of Sterling Silver misting spray.


14 June 2013

Girl Power Canvas

I wanted to make a canvas that says, "girls can do anything".  I started with a 12x12 canvas.  I covered the entire canvas with pages from one of my favorite books "Song of the Siren" by Philippa Carr.  This copy was printed in the '70s and there were some nice texture and aging going on. I did not have to do anything to age this before mod podging onto the canvas.  The next step was to add a bit of color. I used a remnant of a sheet of Graphic 45 paper.  It was in the Steampunk collection, but I forgot the name of this sheet.  I do believe it is out of print.  I did an overall coverage of mod podge to seal all this together.

While this was drying I began sketching the girl I would use.  Here is both the beginning sketch and the final product.  I cut her apart to use as a pattern.

I next swiped on some color. I used some of the colors from the Graphic 45 paper, a blue, brown, gold, and pink.  I swiped on a bit of the color with a brush or my fingers and dabbed it off with a paper towel.  I added some stamps, an Eiffel tower, houndstooth, swirling dots, and a stopwatch.   Some I embossed and some are just straight Staz on inks.  I just kind of had fun. No rhyme or reason, just fun.

Using my new branch die from Tim Holtz, I added a branch.  I cut this from grunge paper and embossing it with Vintage Photo embossing powder.  I found some red tulle that I tied to the branch.  Oh, and the die had a bird on it too, I cut him off and use an owl stamp to add an owl element.

The girl was mod podged directly onto the canvas.  She was in many pieces and I just pieced her together right there, covering her all over with mod podge.  Her shoes are painted on and not paper.  When she was dry I added the black lines and hair.

The bottom is finished out with some pom pom ribbon and a crocheted flower my mother-in-law made about 20 years ago.

The quote is wonderful!  Believe in your dreams and live them!!!


12 June 2013

Homemade anti static bag

I have wanted an anti-static bag for quite some time.  They are not that expensive, but I still hate to spend that money on something that I think I can make myself.

Today I have made three bags in an effort to see which formula would work best.  The formulas I tried were simple: baby powder, baby powder, and cornstarch and corn starch.

The bags were also very simple to produce. I took a jewelry polishing cloth and cut out three rectangles of fabric. I did not measure, but I would say that the rectangle was 2x5.  I stitched up the sides. I wanted to make sure they were secure so I used a row of straight stitching and then a zig-zag stitch.

I then labeled the top of the bags with a C (cornstarch), CB (corn starch/baby powder) and a B (baby powder).  I then filled the bags.  I used the same ratio for the mixed bag, 2 t of each.  The other bags, I did not measure.

Once the bags were filled, I closed the top of the bags using a row of straight stitches followed by the zig-zag stitch.

Had I been making the bags for "looks" I would have been more careful with my stitching and the overall look, but since this is just an experiment functionality was my only goal.  :)

I plan on using them each for a while and seeing which one I like best.  Have you ever tried any of these techniques?  I would be interested to see what works for you. 


09 June 2013

Some bugs hanging out among the roses

On this fine day I was trying to decide what to do with the remnants of a K&Co pad that I have had for quite some time.  The pages that were left didn't thrill me so I had done nothing with them.  I decided today would be the day to change that.

I took the pages and cut out petal shapes from each page. Then I inked the back of each petal and misted each one.  While wet I wadded each petal as if each one was a piece of trash.  Then I straightened each one out.  Not perfectly! I left some of the wrinkles.

The next step was sort of messy so I did not take photos of that.  I rolled one petal up to look like the center of a rose then glued other petal around this one. You put the petals on one at a time and spin the flower around.  This looks more like a natural rose.  I would also fold over the top portion of each petal to add dimension.

The next step was to build a base for my decoration. I took an otterbox box and covered it in green paper.  Then I inked the box.  I glued a piece of Styrofoam to the middle of the box.  Then I started gluing the flowers unto the Styrofoam and box.  Once I got all the flowers where I wanted them I misted the box with Michelle's Musings Sterling Silver misting spray for a tad of sparkle.  I then to strips of tulle and folded in half.  Where the half mark was I tied a knot. I pushed a straight pin into the knot making a "tulle pick".  I then took these picks and inserted them in random spots around the flowers.

On my craft sheet I wet paper. I molded the paper into shapes that looked like bees and a butterfly body.  I molded the head and bodies of the bugs separate, this photo was taken after I had hot glued the head unto the bodies.  The next step was to attach some way to attach the bugs to the flower mound. I had some wire and decided to twist one end around a toothpick and inserted it into the foam between the flowers. I curled the wire to look a bit like a flying trail.

Once the bodies were all ready I painted them black.  After the black dried I used gesso to paint white stripes onto the bees.  Once this dried I would paint yellow over the white.

The butterfly body was made with the clear part of packaging.  I cut two just alike. On one side of the packaging I painted a design.  Once it was dried I glued the two butterfly wings together.

It took a long time for the bodies to dry. Once they did I glued the butterfly body to the wings. I wrapped a bit of wire around the bees necks and hot glued.  The butterfly body is sort of woven unto the wire and hot glued.

I used a vintage blue ribbon around the sides of the box and it's done.  Pretty cute table decoration.


Baby measurement album

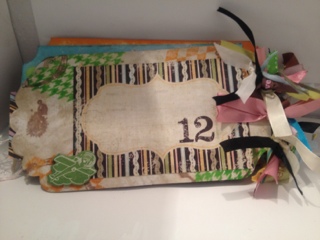
This is a mini album I made for a friend.  It is a way to document growth stats each month of the first year of the baby's life.

I bought the paper at Archiver's.  The album came from Michael's.  Hope they like it. 


Review: The Story She Left Behind